Rice Dishes


Vegetable Biryani
On October 20, 2011 by Meghalee Das“Vegetable???”, you say? I know, I know, how can it be biryani if it is veg *hides in shame*. But see, sometimes you want to eat biryani, but you don’t have chicken or mutton at home. So do you deprive yourself of eating biryani? No, you just make some adjustments until you eat the real thing. And it is not bad, really, try it!! If you don’t like it, invite me and I will gobble it up. There are two things I cook towards which I am very biased, this is one of them.
As you would know, there are many types of Biryani and ways of cooking it — dum or steamed, rice and meat cooked together, separately or in layers, and a cousin of mine even baked it after the initial process! Now, this is not a site for gourmet food, but something simple that you can make in a jiffy, so I will use a good old pressure cooker! At this point, I would like to give credit to Beti or rather her mother, who makes awesome veg fried rice, which was the original inspiration for this dish, with certain modifications and experiments from my side in my Delhi kitchen. There is some confusion between biryani, pulao and fried rice. But I think biryani is a meal in itself where you don’t need any side dish as it has meat or vegetables in it. Pulao is more like an aromatic rice dish which you are meant to have with other gravy-based food and it doesn’t have pieces of meat in it, although you may have peas, cashews, raisins etc. As for fried rice, ‘frying’ is the key word here, as the slightly cooked rice is fried with spices, vegetables, meat and not steamed.
Based on those lines, here is my humble recipe for vegetable biryani; it’s fast, delicious and ideal when you have forgotten to stock up your fridge or are feeling a tad lazy.

Prep time: 15 min Cooking time: 25 minutes (Need to wait for 10-15 minutes before opening the pressure cooker) Serves: 4
Ingredients:
Basmati/joha rice: 2 cups
Whole spices: Cinnamon (a few small pieces of the bark), bay leaves (2), cardamom (3), cloves (2), cumin seeds (1 tbsp)
Desi ghee: 3 tbsp
Oil: 1 tbsp
Sugar: 1 tsp
Chopped onions: ½ cup
Chopped garlic: 1 tbsp
Chopped ginger: 1 tsp
Chillies: 2, slit
Diced potatoes: ½ cup
Peas: ½ cup
Chopped French beans, carrots etc (optional): ½ cup
Chopped carrots: ½ cup
Chopped carrots: ½ cup
Chopped tomatoes: ½ cup
Cumin powder: 1 tsp
Coriander powder: 1 tsp
Chilli flakes or chilli powder: 1 tsp
Garam masala: 1 tsp
Turmeric: 1 tsp
Chopped coriander leaves: A few
Salt to taste
Method:
1) Wash and soak the rice in water while you chop the vegetables. I prefer to use good quality basmati or joha rice because the aroma is an essential element.
1) Wash and soak the rice in water while you chop the vegetables. I prefer to use good quality basmati or joha rice because the aroma is an essential element.

2) Heat ghee in a pressure cooker and add the bay leaves and whole spices slightly grounded in the mortar or add them directly.
3) When they start to sizzle, fry onions, garlic, ginger and chillies in the ghee.
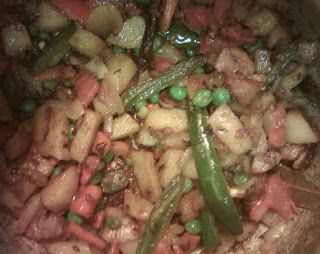
 |
| I apologise for the quality of photos, it is difficult to get clear shots of the inside of a pressure cooker but you get the picture |
4) Put a little sugar and when the onions start to caramelise, add oil and sauté the rest of the chopped vegetables for 5 minutes. (You can also fry soya bean nuggets previously soaked in water).

5) Add the powdered spices and salt and stir for 5 minutes.
6) Stir in the soaked rice so that the spices and vegetables get mixed with it. Add chopped coriander leaves and water just barely above the level of the rice and simmer till the water level starts decreasing. Add water again, enough to cover the rice. This is very important to get the right texture. (Sometimes I am too much in a hurry and due to my carelessness I get a gooey or dry texture. Not cool.)

7) Cook till 2 whistles. Wait for at least 15 minutes before opening the pressure cooker so that the rest of the steam releases gradually. Serve with curd/yogurt or just eat it like that!
 |
| Using good quality Basmati rice ensures that the grains will be long, won’t break easily and have a tempting aroma |
The Real, aka non-veg, Biryani:
1) Marinate pieces of chicken or mutton in curd, turmeric, chilli powder, garam masala, salt, jeera-ginger-garlic-onion-chilli paste for at least one hour.
2) Now follow the same steps of the veg recipe, just instead of the chopped vegetables as mentioned in step 4, add the meat pieces along with the spices, onions, garlic, chillies and so on. (I like to lightly brown the meat pieces in ghee and whole spices, which also helps to cook the meat faster.)
3) Put a layer of previously soaked basmati rice, add a little more water than you would for the veg version and wait for around 5 whistles. Done done done.